Enjoy art with
Augmented Reality
Overview
ROLE
UX UI Designer
Main Tools USed
Figma
timeline
6 Months
INDUSTRY
Art and Entertaiment
Background
The COVID-19 pandemic had a severe impact on museums worldwide. Forced closures due to lockdowns prevented people from enjoying art. The Hong Kong Museum of Arts, celebrating its 30th anniversary, aimed to provide people with a way to enjoy art despite the challenges posed by the COVID-19 situation.
Challange
Most of the museums were closed, and social distancing was necessary, making it impossible to enjoy art to the fullest.
Project goals
First goal
Display 100 artworks from HKMoA's collections in public spaces across all 18 districts of Hong Kong using billboards, digital screens, and transport hubs.
Second goal
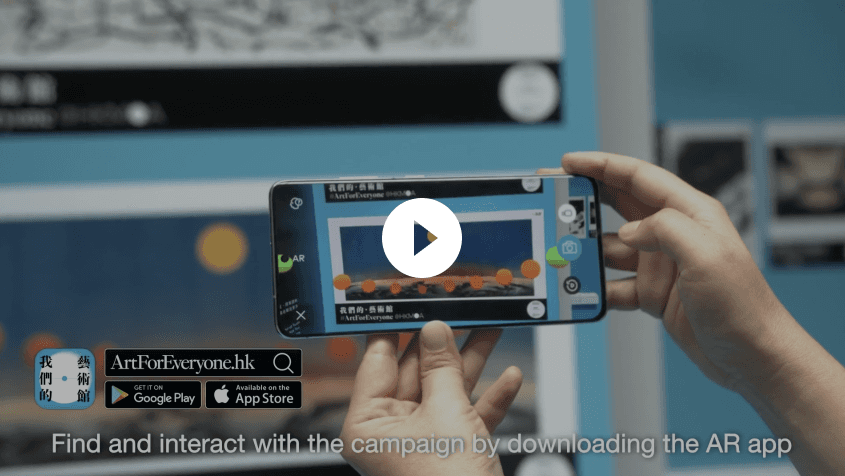
Create an app that will feature AR-enabled interactive viewing and custom personalization for ten of the artworks, making art more accessible and enjoyable for everyone.
We were featured!
We were featured on time out and South Chine Morning Post!
The Process
Empathize
Define & Ideate

Prototype

End Design

Learnings
Empathize — Exploring busines's needs
Overview
Kickoff Meeting
Kickoff Learnings
Understanding the scope of the project.
— Kick Off Meeting
The points covered during the meeting were:
Exploring technical limitations and budget.
Defining the target audience.
Reviewing the artwork planned for use in the showcase.
— Kick Off Learnings
The project had 3 main goals:
Showcase the latest artwork to a broad audience.
Make the artwork easily accessible to people.
Create a more interactive experience so people can enjoy art while also learning about the artist and the artwork itself.
Define & Ideate — Building the app
Prototype — Let's craft the solution
Overview
Sketching
Wireframes
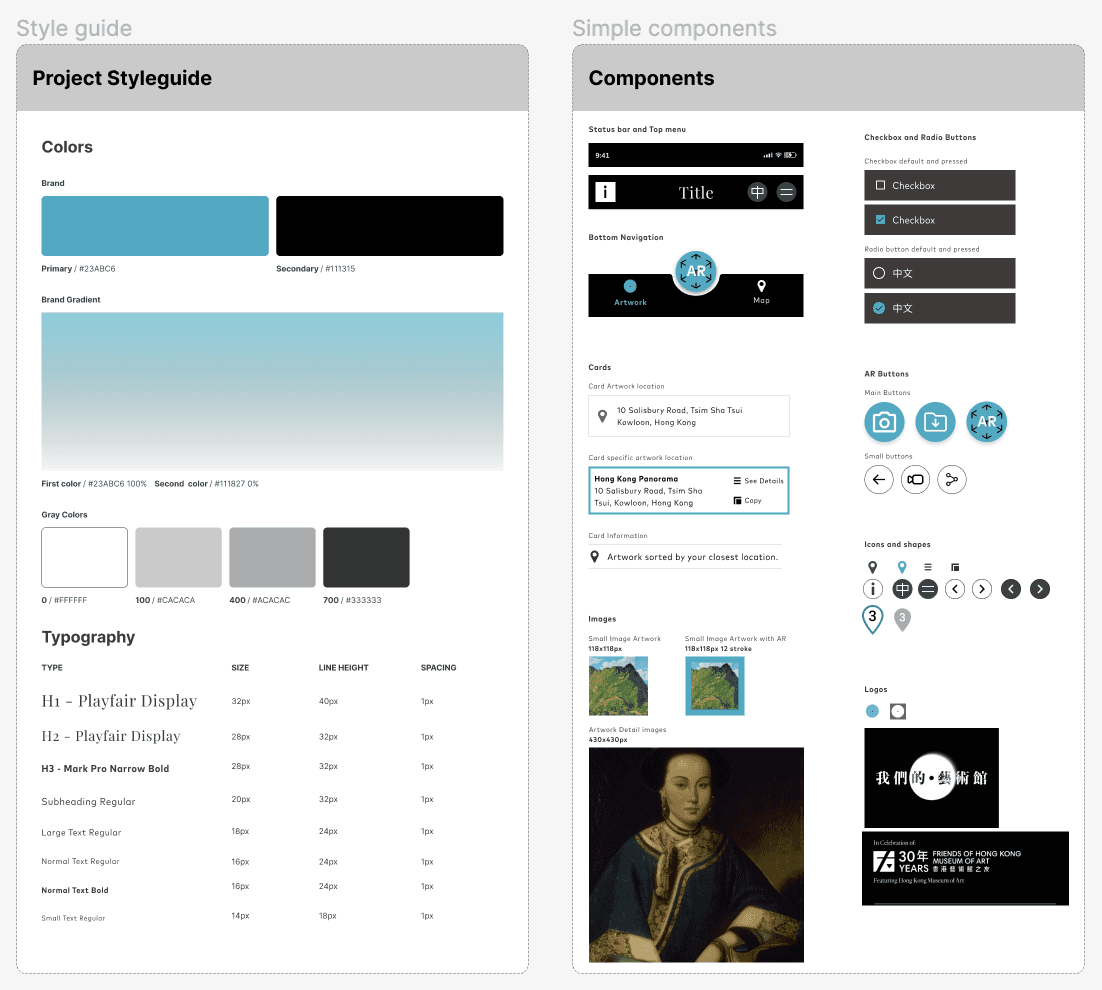
UI Style-Guide
From sketching to Prototype
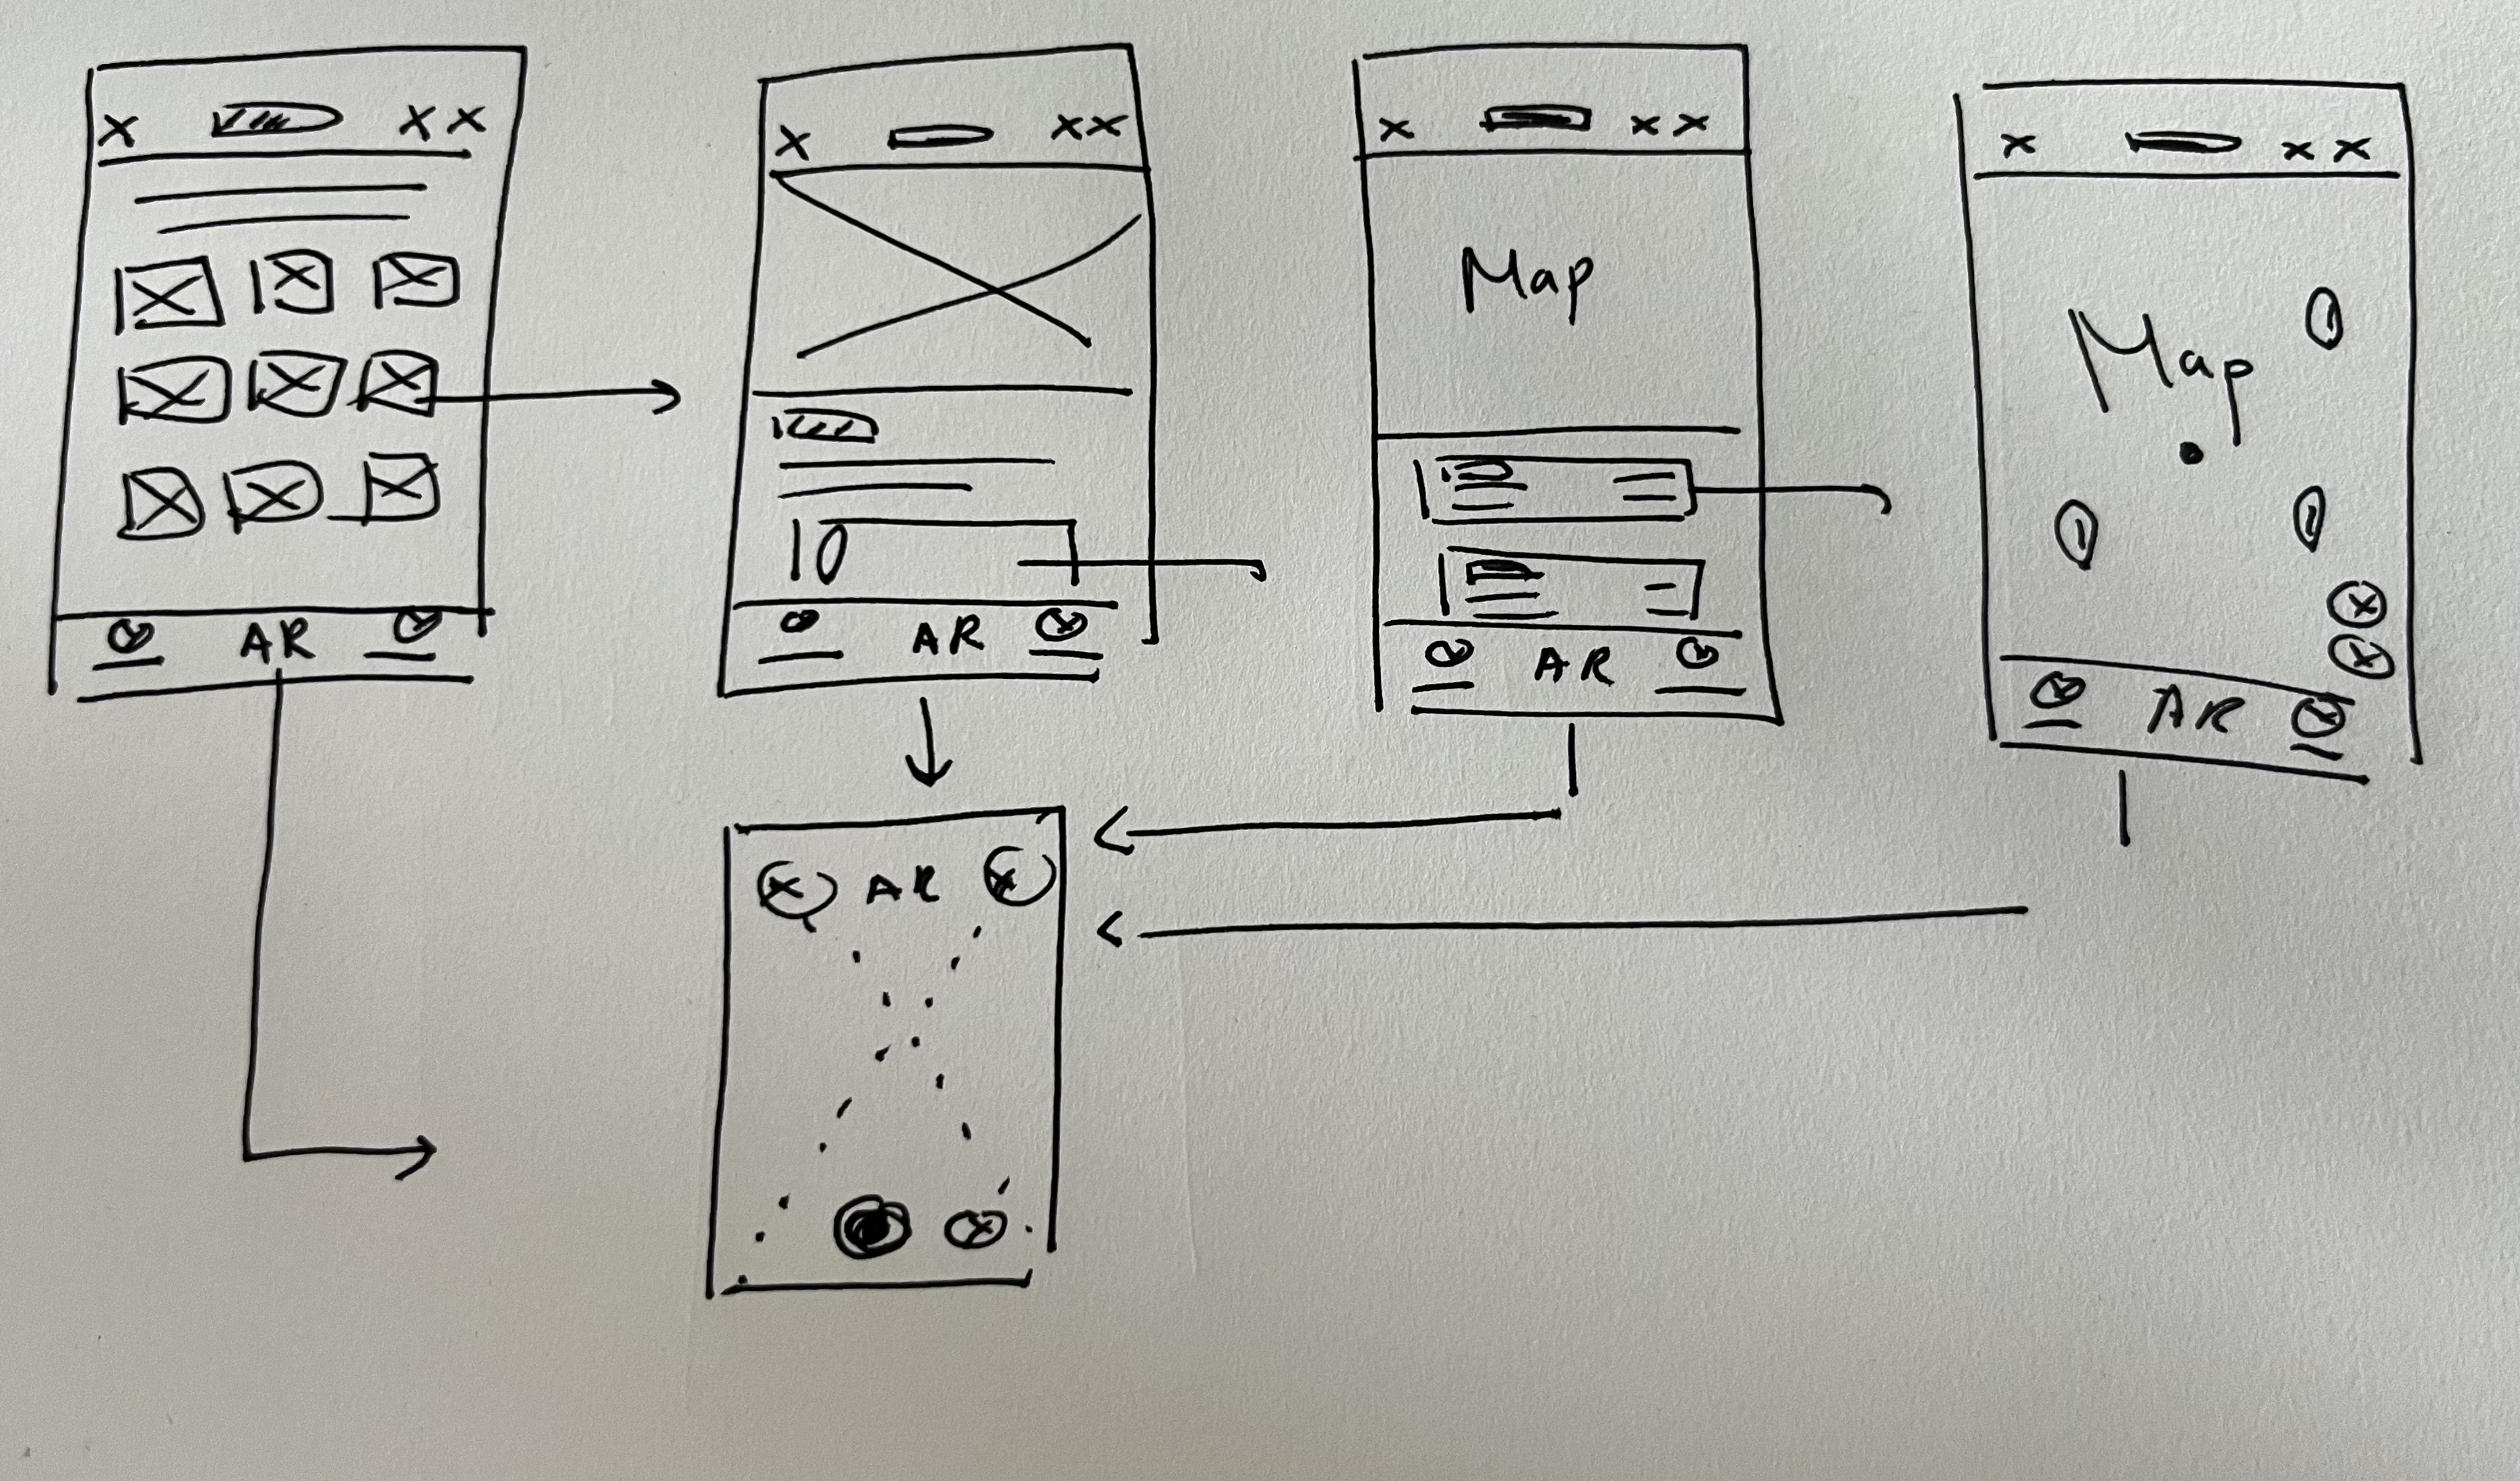
— Start designing with sketches
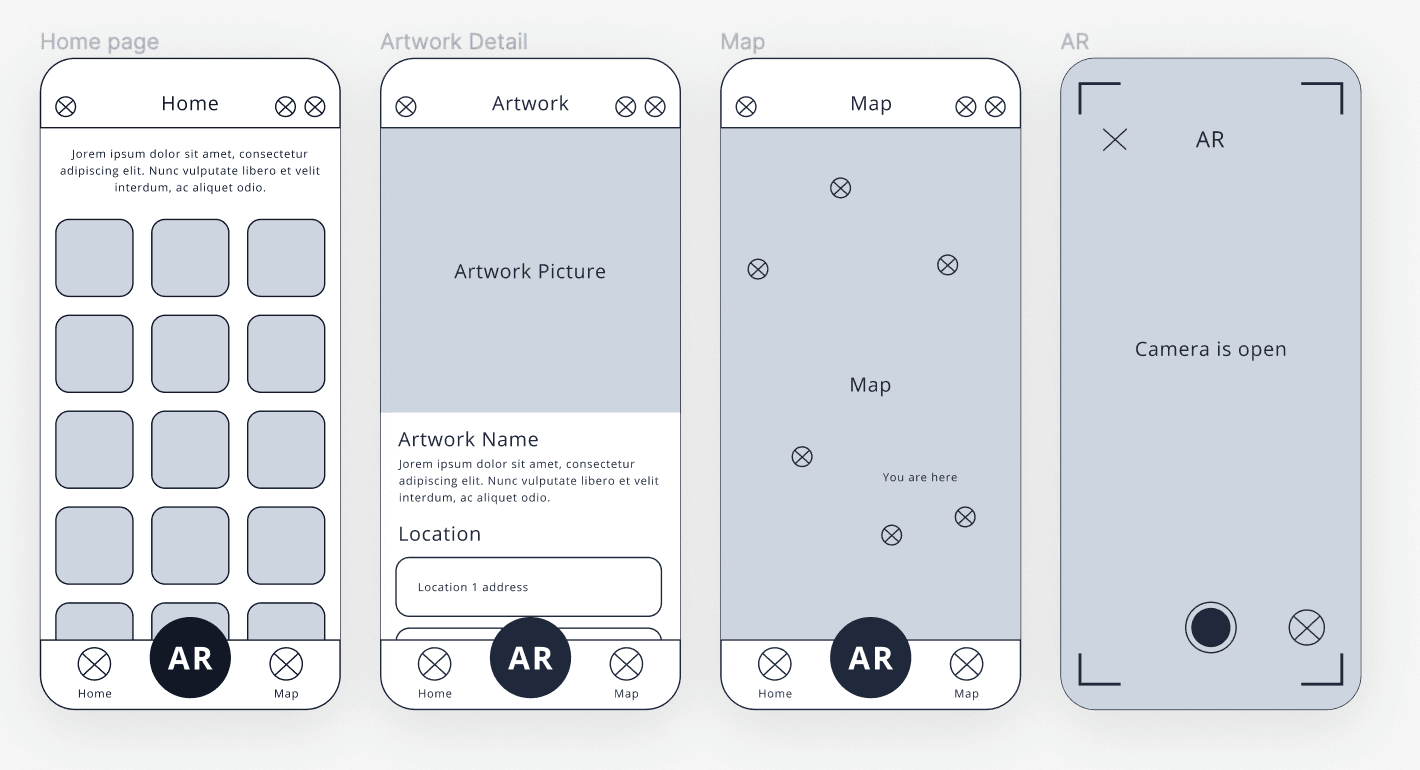
— Wireframes
— UI Style Guideline
End Design — Art For Everyone
Overview
Artwork gallery & Filtering
Artist and artwork location
AR Experience
Landing page promotion
End Design Screens
— Artwork Gallery
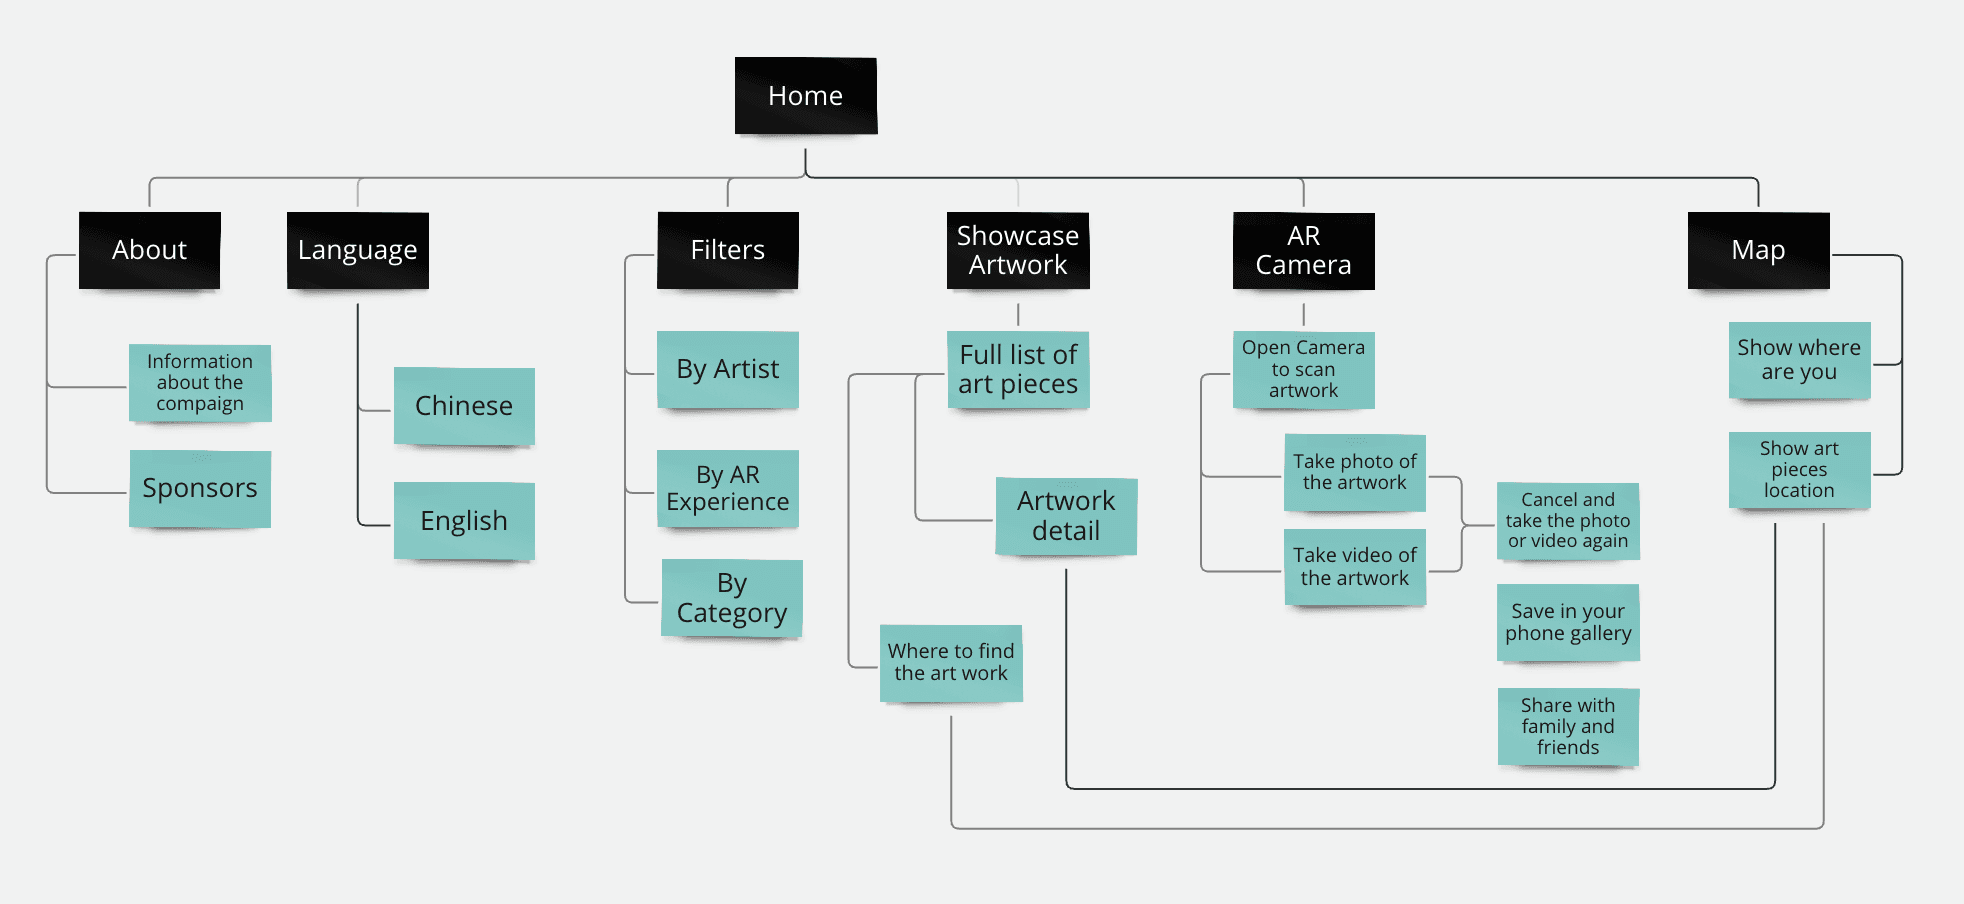
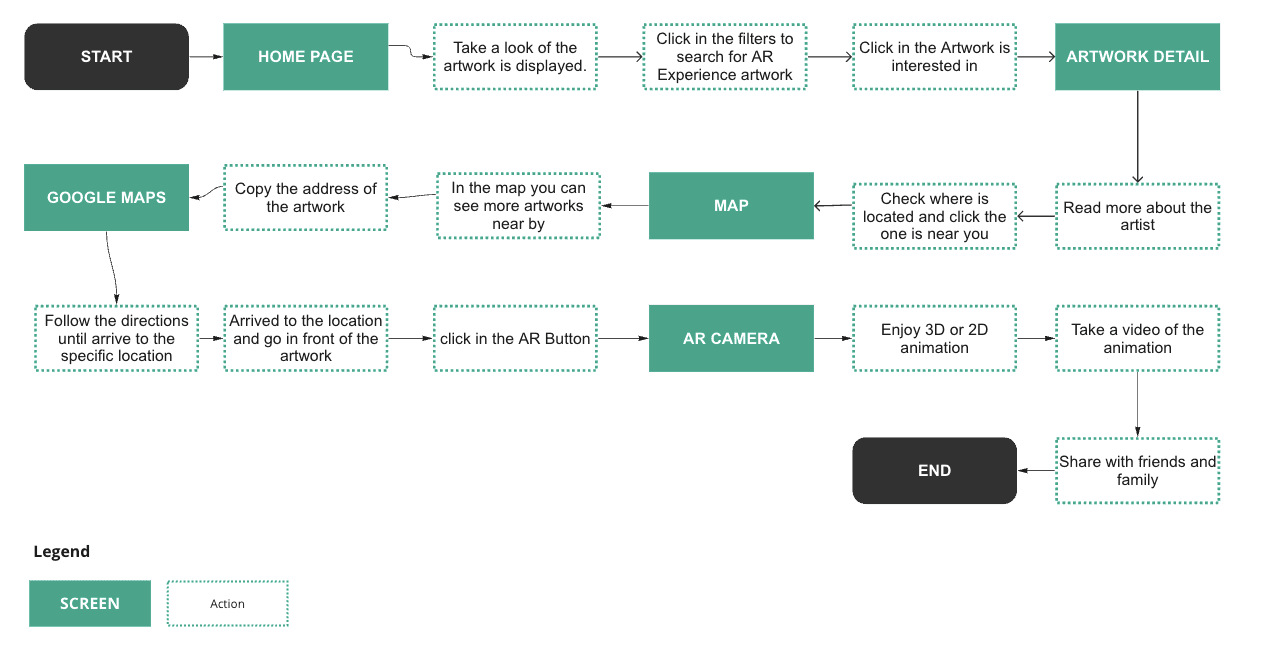
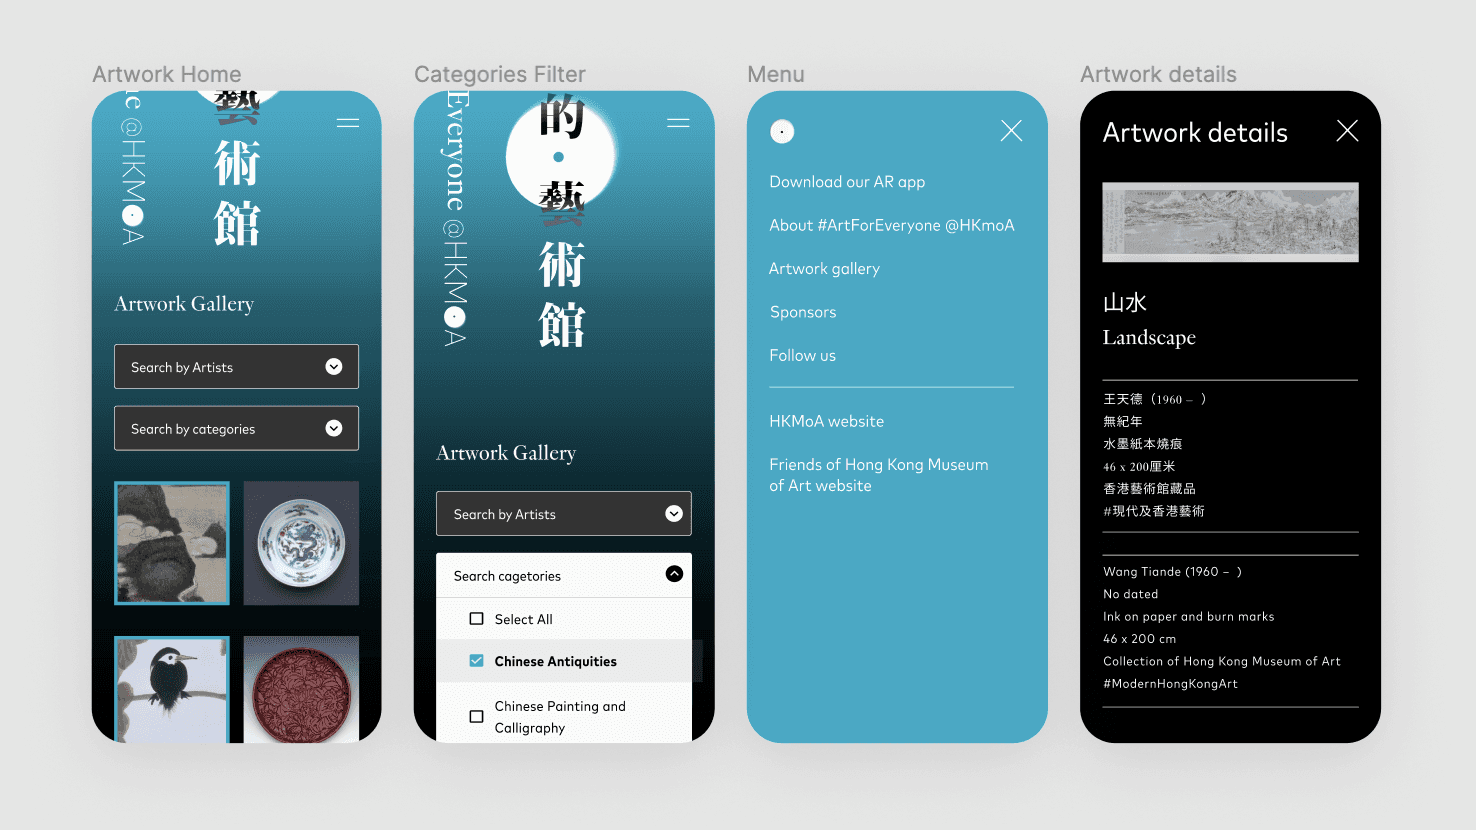
The art gallery screen is straightforward. As the top message shows, we showcase all the artworks organized by current people's locations. The artwork with the AR experience is highlighted in blue, matching the color of the AR button. On this screen, users can browse the artwork, apply filters, change the language, and access the map.
We can filter by:
Artists, so only the artwork of that specific artist will be shown in the Artwork gallery.
AR Experience, so only the artwork with Augmented Reality experience will be shown.
Categories, there are different artwork styles so that we can filter by those different styles.
— Check the artist and location
From the artwork gallery, people can click on the small photo to view more details about that artwork.
Artwork details:
Artwork name, artist, and size
Artwork locations, in this case, one, but if there are more locations, all those locations will be displayed.
From here, people can go back to the artwork gallery or click on the artwork location to open the map with the route already selected.
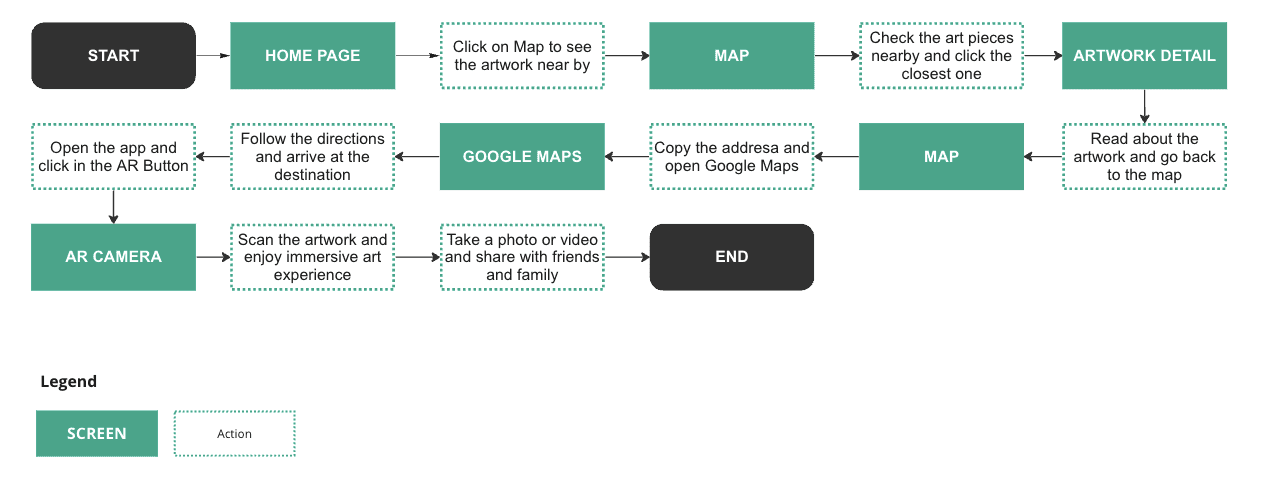
Also, people can click from the artwork gallery directly to the map tab, where they will see the map and all the artwork near people's current location using the pin icon with the numbers; the numbers are how many artworks they can find in that location.
— AR Experience and more info
When people arrive at an artwork with augmented reality (AR), they can tap the AR button in the app to open their camera. Scanning the artwork reveals interactive elements like animations, 3D objects, or color-changing options. Each artwork offers unique interactions.
How does this work?
People scan the artwork, and the animation will start.
They can take a photo or video of that interaction.
They can save the video or photo taken in their phone gallery to share with family or friends.
They can directly share the video or photo on social media.
The last screen is a more information screen, where people can read about the project and who supported this initiative.
— Landing page promoting the app
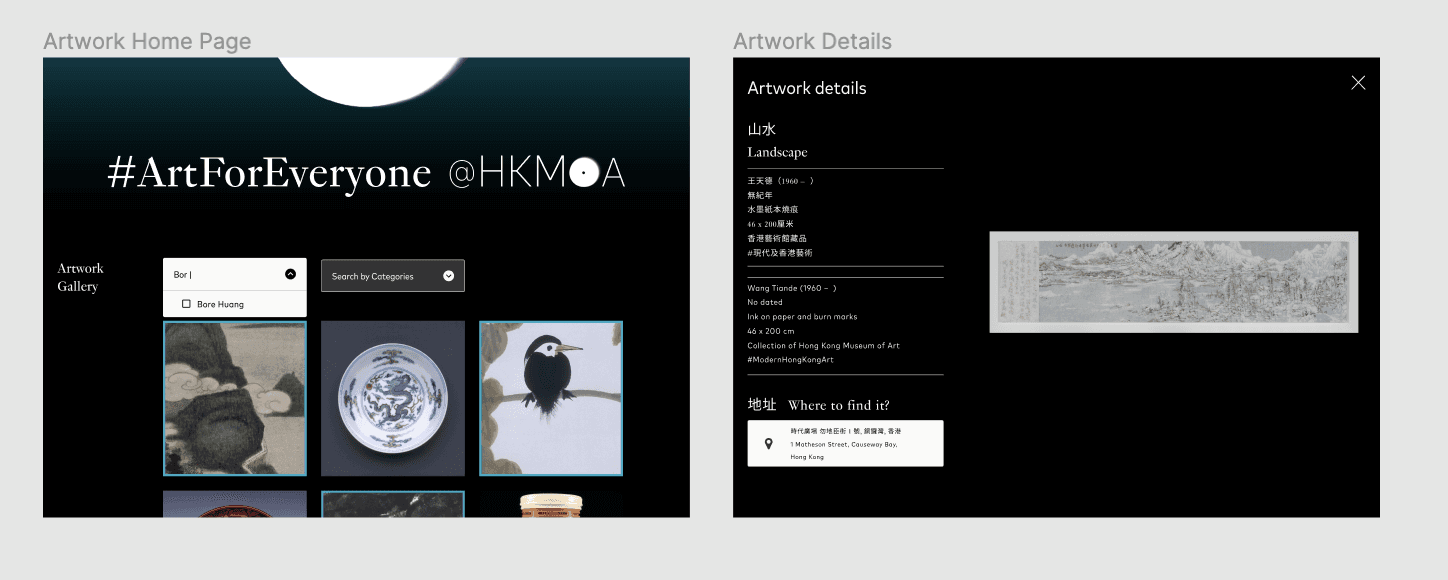
I have also created a responsive website to showcase the app. The website provides information about the artwork and the artist, as well as their locations. However, this website does not support the AR functionality.
Learnings — First months as team of one
Organise, deliver, communicate, and showcase design as the only UX Designer.
My key takeaways were:
Plan, organization, and communication. I learned to organize tasks weekly, document work for team access, and communicate frequently.
Use a design system we can rely on. Due to time constraints, we rely on existing design systems such as Material Design. I have studied their structure, gaining an understanding of their vocabulary.
Self-learning is what needs it. I made sure to dedicate time to learning new tools in order to support our team with our current projects better.


